
by Osprey Photo Workshops & Tours | Aug 9, 2021 | Bird behavior, Bird photography, Chicoteague, Digital Photography, Nature Photography, Photo Tours, Photo Workshops, Rookery, Spring Photography, Spring Photography, Spring Photography, Wetlands, Wildlife Photography
May/June 2021- Heron Rookery Photo Project

From 24 April until 18 June 2021 I was on the road. One of my projects involved documenting the activity in a heron colony populated by a variety of wading birds–Great and Snowy Egrets, Black-Crowned Night Herons, Tri-color & Little Blue Herons, and a few Glossy Ibis. The rookery was in a large marsh on a ridge where low shrubs grow such as Bayberry and Wax Myrtle. Nests were low and among tangled branches that help protect the nests, eggs, and offspring from predators. It was a perfect locations with little chance of flooding and rich waters nearby with abundant food to provide for the growing youngsters.
Photographing colonial birds in a rookery setting requires a very careful approach as to not negatively effect breeding success.
Herring Gulls
Surrounding the heron colony in the tall stands of salt-meadow hay Herring Gulls nested. They chose a perfect location since they could swoop over the rookery harassing the herons and attempting to grab eggs and hatchlings. On several occasions, I saw a gull dive down and hit exposed heron. There was evidence that high water flooded the lower part of the marsh and destroyed some of the nests.


Precautions
I took great care to minimize any disturbance of the nesting birds to avoid interfering with nesting behavior, possibly causing displacement of eggs or the herons abandoning nests. I keep. my visits infrequent, limited in time, and when temperatures were moderate.  Since my intent was to document natural behavior and interactions between individuals, I would have been foolish and unethical to disturb the birds.

My route through the marsh was difficult since I had to avoid soft mud, holes, and tidal guts.   I benefited from past experience reading the marsh and noting what grasses and substrate would support me.

Dressed in camouflage, I approached the colony slowly and indirectly.  I photographed from a  low position, sitting or kneeling on the soggy, water-saturated ground.  Once in place, I  minimized my movement.  It was usually distant noise that would cause the birds to flush from their nests -- the rumble of trucks, planes, boats, and construction projects..  Luckily, the birds quickly returned to their nests and young.

Equipment
Lenses primarily used included my 200-500 mm and 80-400 mm Nikon lenses.with my D500 and D850 Nikon cameras attached. The telephotos were necessary to keep my distance from my subjects and yet isolate them. Zoom lenses provided for flexibility. As the birds moved and interacted, I could adjust my focal length to capture the range of motion. Most shots were taken using a tripod with a sturdy ball head or gimbal mount. I used waterproof sleeves over the base of the tripod legs to protect the joints from damaging grit and corrosive brackish water.


Changes from May into June
During May, many herons displayed breeding plumage and bright colors around the eyes and bill. A few still were engaged in mating, courting and nest building, with some birds carrying sticks. In mid-June, courtship feathers were less obvious and the facial colors had faded a bit. There were eggs in some nests and young birds in others.


Capturing action
One of my goals was to capture arial fighting and aggressive behavior as birds landed in the bushes and jockeyed for position to access their nests. I carefully observed the colony concentrating on areas where there was more activity and less tolerant birds. Aggressive actions included nipping, stabbing, feather pulling, hackle raising, or just landing on the back of an opponent.
I had the best luck capturing the arial fights when using my 80 – 400 mm lens and shorter focal lengths since it was nearly impossible to predict exactly where and when the action would occur.


Focus Difficulties
If the birds were flying with sky in the background, I focused using a small group of focus sensors. When multiple subjects were involved, I selected an f-stop that offered a bit more depth of field than usual such as an F11 or 16.  But to freeze action with high shutter speeds, I had to use higher ISOs than I typically prefer (often 1000 or 1250).  When the birds were perched on branches or were landing,  I often used a single focus point over the bird's eye.

With auto focus, I had problems with the sensor locking on branches and leaves, not the bird.  Sometimes manual focus was required. Because the nest were located deep within shrubs, I struggled to get clear shots of the birds landing and interacting without branches, grass, shadows or the wings blocking their faces.

Final Thoughts
Most folks find marsh foreboding with muck, unpleasant smells, and pesky flies and mosquitoes.  For me, they are marvelous places filled life and new things to discover.  When  involved with projects like this one where I am deep within a marsh, I find solace and a connection with nature.

Marshes are critical ecosystems that need our protection, not destruction  They are highly productive and a haven for wildlife. They trap sediments and remove nutrients and toxins from the water that can clog our waterways, poison wildlife, and deplete life-giving oxygen.

by Osprey Photo Workshops & Tours | Mar 4, 2017 | Digital Photography, Nature Photography, Photo classes, Photo instruction, Photo Tour, Photo Tours, Photo Workshops, South Dakota, Travel, Wildlife Photography
Badlands National Park Spring Escape
June 4 – 9, 2017
With trip leaders – Sandy Zelasko & Irene Hinke-Sacilotto
SOUTH DAKOTA – Photography Tour
sponsored by

in conjunction with

“Eat more flowers”
INTRODUCTION
During this South Dakota photo tour, we will explore Badlands National Park and locations in the vicinity. On most days, we will be in the field at dawn to take advantage of the early morning light. Likewise, we will end each day’s activities at sunset. When the sun is low in the sky, the light accentuates the relief and texture of the land. Colors are warm and the contrast soft, so details are not hidden by the dark shadows present at noon-time. At dusk and dawn, animals are more active and easily located. We will reserve mid-days for rest, reflection, image transfer, and travel between locations. There will be a variety of photo opportunities, including both scenery and wildlife.

Badlands Formations
BADLANDS NATIONAL PARK, SOUTH DAKOTA
Once the site of an ancient sea, the South Dakota Badlands have been transformed over thousands of years into the land you see today. Layers of sediment and ash were eroded away leaving behind multi-colored rocks and boulders balanced on pedestals of stone. Eroded canyons and isolated buttes stand as testament to the power of the wind and rain. At first glance, the land seems sterile, yet close examination reveals a variety of creatures. Agile bighorn scale steep canyon walls. Pronghorn and buffalo graze on the succulent prairie grasses while hawks circle overhead. A loop road travels through the northern portion of the park providing easy access to unusual geologic formations and favorite wildlife haunts.
An active prairie dog town lies along Sage Creek Rim Road. The colony’s occupants are enjoyable to watch and photograph as they groom, nibble on grasses, and romp playfully with their siblings. Now and then a shrill alarm call ripples across the colony warning of a potential intruder — perhaps a badger or coyote in search of a meal.
South of the Sage Creek area in the second unit of the park is Sheep Mountain Table. At the base of the plateau are formations with rocks balanced on limestone pedestals. A rough dirt road climbs to this high, flat plateau which is isolated from the surrounding terrain by deeply cut canyons. On top, the views are spectacular. Dirt roads extend like fingers to a variety of vantage points on the rim of the table. (access is dependent on road conditions at the time)

Wild Turkey

Bighorn Ram

by Osprey Photo Workshops & Tours | Mar 27, 2016 | Bird behavior, Digital Photography, Nature Photography, South Texas, Tangier Island, Wildlife, Wildlife Photography

Black-Bellied Tree (whistling) Duck feeding along the edge of pond.
Photo Blinds for Wildlife Photography
Blind Construction
Blinds or hides are used by both hunters and photographers. By the word blind, I mean a tent or structure made of camouflage material to hide you and your camera from the animal you intend to photograph. Typically they are placed in locations where animals visit frequently. They allow you to photograph wildlife in its natural state, without its behavior being altered by human presence – feeding, courting, caring for young, interacting with other, etc. Typical places to locate a blind are near a watering hole, food source, den, lodge, nesting site, baited area, backyard bird feeder, etc. Blinds need not be fancy or perfectly match the surrounding as long as their shape is somewhat disguised by the pattern of the fabric or materials used in construction. It is important that the fabric does not flap noisily in the wind. Success is most likely when the blind is in place for enough time for the animal to become acclimated to it.

Blinds along side lake. Wooden frame.
I have used blinds suitable for photography from the following web sites: http://www.sportsmansguide.com, http://www.basspro.com, http://www.cabelas.com, http://www.dickssportinggoods.com, and http://www.rue.com. The best are lightweight, easy to set up alone, and relatively inexpensive. Even cheap tents can be modified to suit your purpose by camouflaging them using spray paint. I typically modify the blind I purchased to better suit my needs for photography, adding openings for my lenses on 3 or 4 sides. I fit the holes with sleeves made from camo mesh (2 or 3 layers) to cover the lens and I add an elastic closure to adjust the sleeves to the diameter of the lens. The mesh disguises the lens while allowing me to look for the approaching animals. I also add small observation windows of the same multi-layered mesh for the same purpose. More permanent blinds that I have constructed, I have a wooden frame made from cheap 1 x 4 and 2 x 4 pieces of lumber, approximately 42 inches long. I cover the frame with cotton camo material purchased from a fabric store, which I staple in place. Burlap is a cheaper cover used by many photographers but I am allergic to it. Side pockets inside the blind are useful for storing small accessories. You can further disguise your blind adding branches or grasses local to the area.

Blind opening with flash using dropped mesh fabric rather than sleeve.
Hot Climates
When working in hot climates, I add ventilation holes made of camo netting near the top of the blind to allow the hot air to escape. Photographers have been known to suffer from heat stroke when exposed to high temperatures for a long period of time. Always take water into the blind. If extremely hot, carry a spray bottle filled with water and spray it on your skin. The cool water drops your body temperature. Even wetting down the interior wall of the blind can lower internal temperatures. When working in hot humid conditions, avoid bring the camera and lenses indoors unprotected where the moisture from outdoors will condense on the glass. Place camera and lenses in a plastic bag where any moisture will form on the surface of the bag and not the equipment. Similar problems can develop when lenses are taken from a warm room into cold. In humid conditions, consider storing camera gear in a bag with silica gel, a drying agent.

Blue wing teal attracted to corn in the bottom of the pond in South Texas where temperatures can soar into the high 90s & low 100s in the summer.
Entering a Blind
I enter the blind at times of low activity or in the dark. For a nervous subject I place the blind at some distance away from the final position and move the blind in place over a period of time. A tactic to fool your subject into thinking the blind is empty is to have two people go into the blind and then one person leave. By watching the animal’s reactions, you can determine if they have accepted you and the blind. In its presence, they should resume their normal behavior.

Osprey landing on nest. Placed blind a distance away to observe the osprey’s behavior.
Placement
For placement of the blind, I consider the background behind the subject and the surroundings where the subject will be photographed. Bright rocks, shiny objects, bright colors, and dark strong forms if distracting should be avoided. The direction of the sun at the time of day you plan to photograph should be considered. Usually I prefer to have the sun to my back or to the side. On ponds, I often have two blinds, one for morning and one for evening shooting. Some photographers working on long-term projects place their blinds over a dug out trench. Chairs are placed inside so the photographers can shoot at eye level with their subjects. I find with a long lens such as a 600 mm and a little extra distance from the subject, the angle of view is relatively horizontal giving the illusion that you are shoot eye to eye with the subject. For best results, while in the blind stay alert. Animals approach very quietly. Listen carefully and watch for movement. It is not the time to read a book.

Deer attracted to water near one of my blinds during a dry period.
Cover Scents, Game Calls
If the animal has a good sense of smell such as a coyote, then fox urine, skunk and other cover scents distributed around the blind will help disguise your presence. Like hunters, you could use game calls to attract animals closer to the blind. Duck and turkey calls, courting sounds, and predator calls can be bought in most hunting stores. Decoys placed in front of the blind can also increase your chances of success. Decoys are available for ducks, geese, turkey, etc. From their stands or camouflaged boats, duck hunters use both calls and decoys placed in the water in front of their blinds to attract waterfowl flying overhead.

Turkey are attracted to game calls during breeding season.
Baiting
On privately owned ranches and farms, baiting is a great tool to attract wildlife. Obviously you must have the owner’s permission to be on their land. You typically want to bait areas where you want your subjects. For deer, javelina and waterfowl, I have used whole corn (in water it sinks under surface). For songbirds bird, sunflower and other birdseed is perfect and for woodpeckers depending where you are located, suet or fruit may be effective. Cat food works well for raccoons and some other mammals. On federal land, private blinds and baiting are typically prohibited. However on some refuges, blinds are provided for visitors. Without bait and decoys, these are often not as effective as a blind where you can add enticements. I spent a lot of time in South Texas on a ranch where I could deploy blinds where I desired, at watering holes etc. In many cases, I enhanced the environment with logs, bushes or perches. I have also placed a blind in a ditch or pond using a float designed for fishing or a Styrofoam platform of my own making.

Turtle on a prop provide in pond near my blind.
No mater what approach you use, working from blinds can be very exciting and rewarding. There is nothing like being just a few feet from wildlife and walking away with great photos.

Hawk drinking shot with 600 mm lens which gave the illusion that I was shooting on eye eyelevel.
Skimmers courting. Blinds help capture behavior otherwise seldom seen at close range.

by Osprey Photo Workshops & Tours | Dec 17, 2015 | Autumn photography, Canadian Rockies, Digital Photography, Fall photography, Nature Photography, Photo Tour, Photo Tours, West Virginia, Wildlife Photography
Two of my favorite locations for autumn photography are the mountains of West Virginia and the Canadian Rockies.

Aspen on hillside, Canadian Rockies
With the arrival of fall, to the delight of photographers, leaf color changes, birds migrate, and animals move from the high country to lower elevations. But also rain and overcast skies often accompany the seasonal change as temperatures fluctuate and the weather becomes less stable. Such conditions can render images dull and flat, but can also be an asset.
Rain – the Sliver Lining
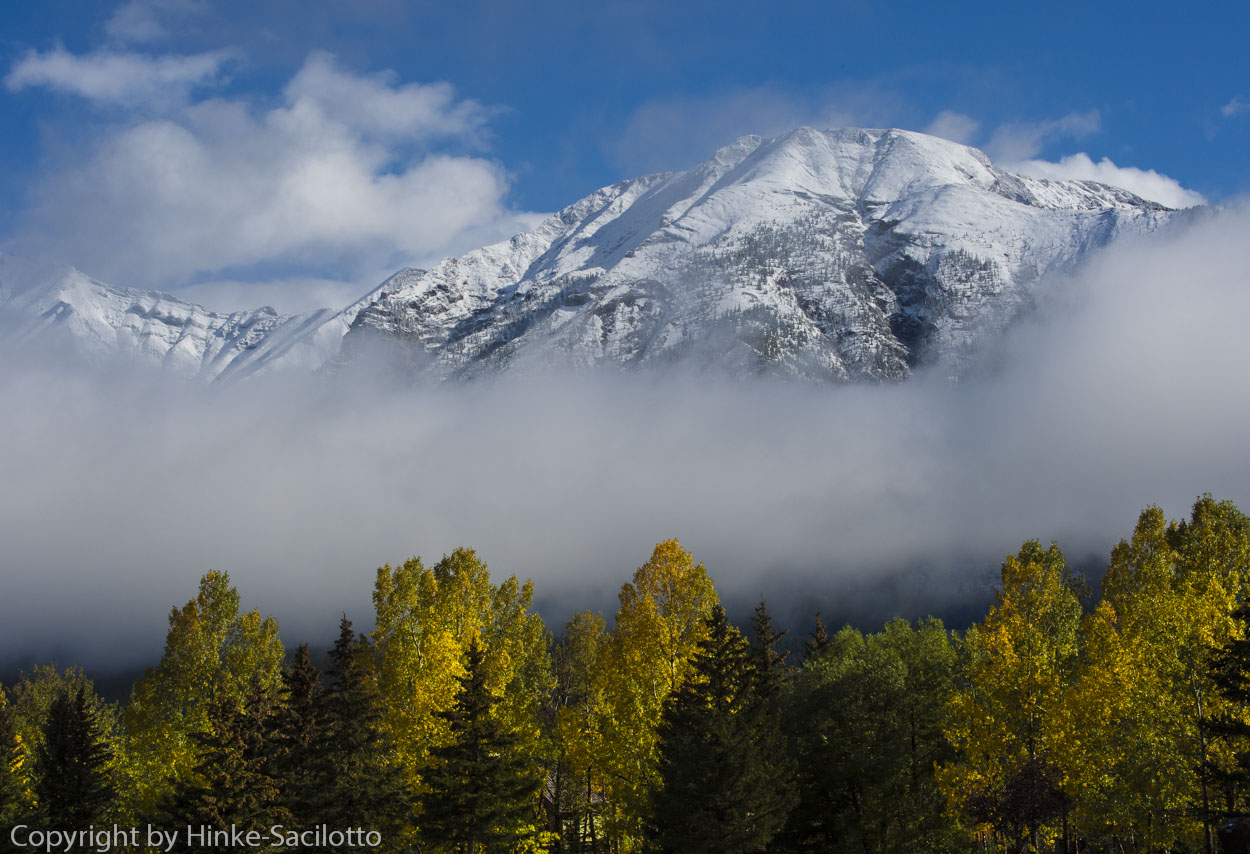
In the Canadian Rockies this September, we had 2 days of continuous hard rain, so much that rock slides blocked the main highway. We just took the time to relax, read, and work on images. Although being driven inside by the rain was disappointing, the following morning was spectacular with beautiful fresh snow on the mountain tops.

Snow Peaks, Canadian Rockies
Rain can be a both a blessing and a curse. With rain, the grass becomes greener, rainbows appear, water droplets adorn leaves and spider webs, pools of rainwater reflect the colors around them, and waterfalls and cascades flow more swiftly. The color of vegetation becomes more saturated. By using a polarizing filter to remove shine on surfaces, you can make colors even more intense.
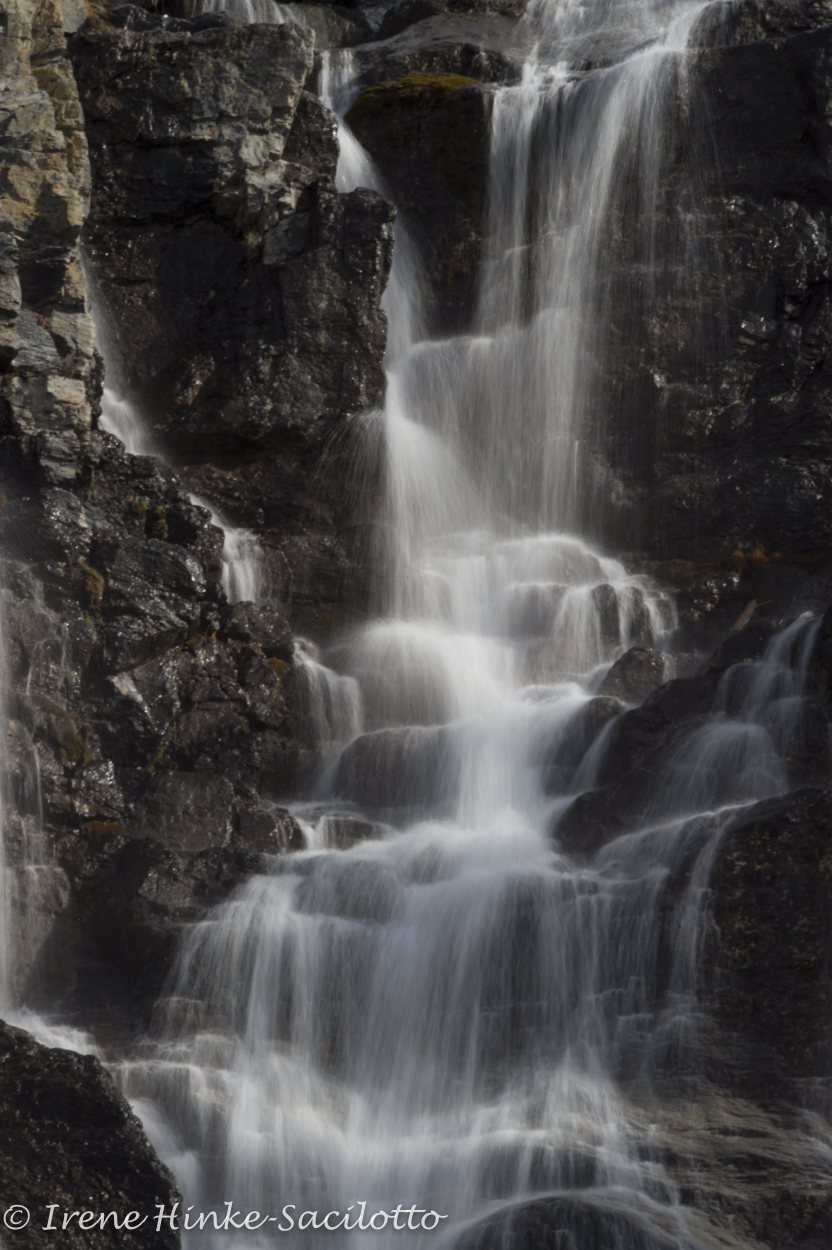
Tangle Falls after rainfall.
Ok, so the next image is not related to fall photography but it makes the point that rain can be a good thing. My photos that I shot in Costa Rica of hummingbirds in the rain, were some of my favorite from that trip. (A cheap kids poncho or large plastic bag will keep your gear dry in case of an unexpected downpour.)

Fiery-throated Hummingbird in the rain, Costa Rica
Fog & Overcast Skies
Overcast skies, low cloud banks, and fog generated by temperature changes in the fall can present photographers with unique photo opportunities. When I rise in the morning, I let the light direct my activities. On a foggy morning, I will head to a nearby lake, pond, or low area where the fog creeps along the ground and slowly rises with the heat of day to reveal interesting ghost-like silhouettes of trees, bushes, and mountains ranges. If in Shenandoah National Park, I am likely to go to a high point to photograph the fog hanging in the valleys between the mountains. (Note: Be careful when exposing foggy scenes. Depending on your camera, if your light meter is reading off of the fog layer, then it will adjust the exposure to render the fog mid-tone gray. This will often result in an underexposed photo. Add more exposure to compensate).

Snow covered peaks near Canmore, Canadian Rockies

Morning fog over river, Jasper, Canadian Rockies
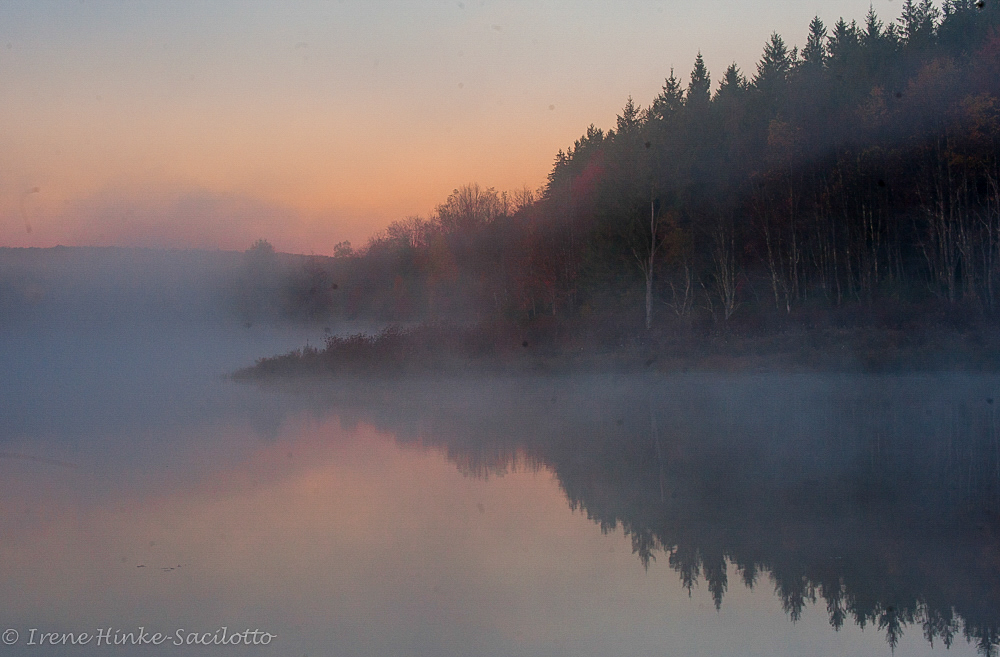
Blackwater Falls State Park, Fog over Pendleton Lake.at dawn.
If instead of fog, I wake to a sky that is lightly overcast, I will head to a location where the soft light complements the scene, e.g. to a waterfalls, cascade, stand of trees, woodland trails, flowing streams, delicately colored wildflower, etc. On a bright sunny day, photographs of these subjects will often be disappointing with distracting backgrounds, hot spots, and deep shadows that hide important details. (If the sunlight becomes to bright for your subject, you can sometimes get acceptable results by waiting until the light is diffused by a passing cloud.)

Linde Point, Blackwater Falls State Park, view down Blackwater Canyon. Soft light reveals details.
The Wonders of Backlighting
Backlighting and side lighting bring out the vibrant color of autumn leaves. By using a polarizing filter you can intensify the effect by removing glare from the surface of vegetation. Even towards mid-day, polarizers can sometimes help you achieve satisfactory results. Take note that flare can be a problem when pointing the camera towards the sun. Flare appears as unwanted bright spots across the image or a bright wash over the photo. Flare spots are created by the sunlight reflecting off of glass surfaces within the camera lens or filter. How can you reduce flare? Your lens shade can help but you may need more assistance. You can shadow the lens with a jacket, hat, card, umbrella, or person’s shadow. You can also stand in the shade of a tree or building. Sometimes you can reduce flare by aiming your lens such that the sun is blocked by an object such as behind a cloud or tree limb.

Pond at Canaan Valley State Park. Fall color reflecting in a pond. (For reflections in ponds and lakes, you may capture better color in the water from the surroundings trees by moving to a higher vantage point where more of the water’s surface is visible.)

Backlit fern

Backlit Tree, Canaan Valley

Dolly Sods. Leaves from blue berry bushes turn red in the fall and glow when struck by the late afternoon sun.
Isolation and macro landscapes
Instead of using your wide-angle lens for all landscape photos, consider isolating portion of the scene using a telephoto or macro lens. (Be careful when using wide-angle lenses for landscapes. They alter perspective and shrink the size of items in the background; thereby, lessening the impact of a photo. The mountains you emotionally reacted to are reduced to bumps on the horizon.)
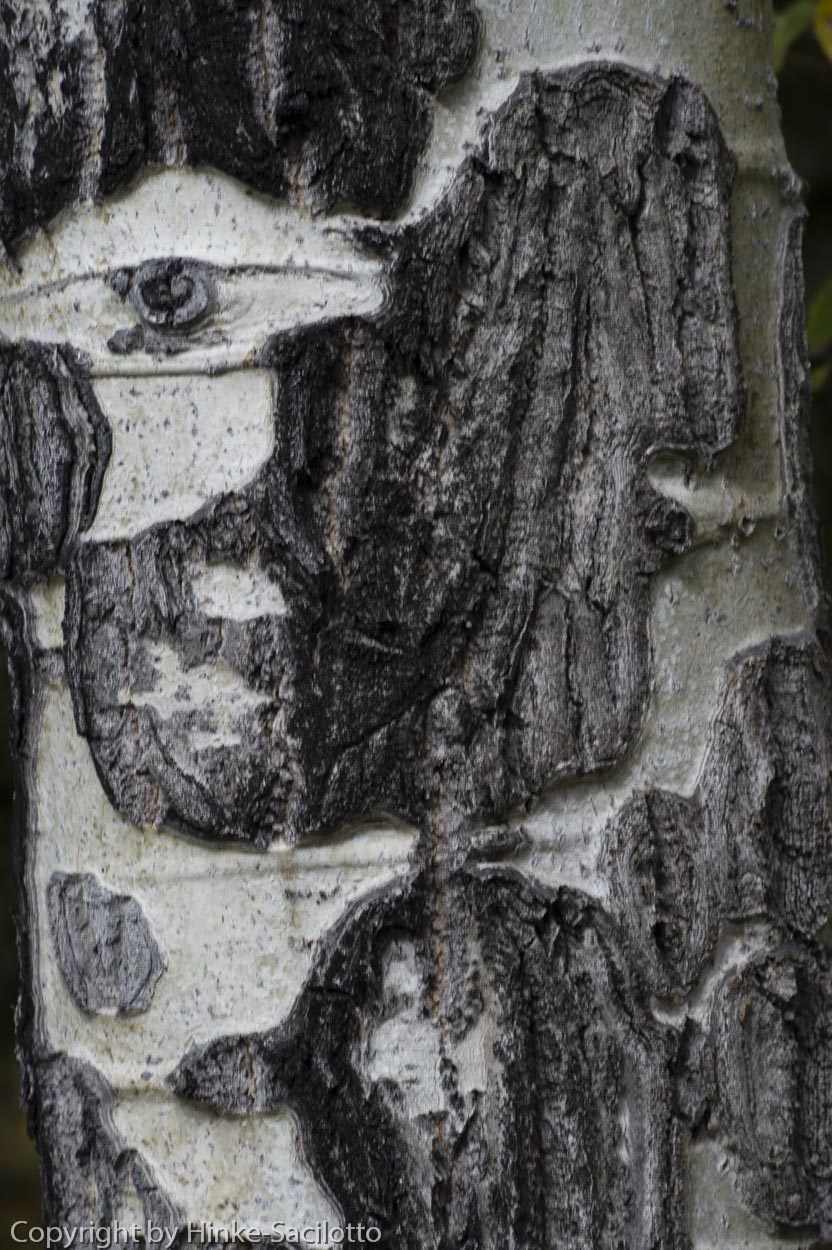
For any photo, identify what attracted you to the scene. Then chose your lens , angle of view, lighting, etc. to emphasize what initially impressed you. Concentrate on the key elements and simplify the image, eliminating the non-essential components. Instead of capturing a broad landscapes all the time, look for patterns and portions of the scene that have high visual impact. These are what I call macro landscape. Little things such as bubbles in a stream, water droplets on a fallen leaf, lichen covered rocks, distinctive patterns on tree bark, colorful reflections in a pond, the flow of water across a rock, etc. can be perfect photo subjects.

Bubbles in stream

Fallen leaves floating in pond, fall color, Canaan Valley

Iceland cascade.

Bark Patterns
Slow Shutter Speeds
For streams and waterfalls, its fun to experiment using low ISOs, small apertures, and neutral density filters, achieving slow shutter speeds to blur the motion of the water for an artistic effect. With flowing streams, slow shutter speeds can add sense of motion which can be sometimes enhanced by swirling patterns of colorful leaves, bubbles, or foam. There is no way to perfectly predict what the final results are going to be, so take a number of shots with different settings. Use your camera’s playback mode to judge results.

Slow shutter speed. Photo of cascade. Canadian Rockies.

Swirling water in a stream.

Roadside cascade, Canadian Rockies. Slow shutter speed to show action. Soft light to avoid hot spots.
Location, Location, Location
If the leaf color is not good in one area, don’t give up. It might be spectacular a short distance down the road. Autumn colors vary with temperature, rainfall, and altitude. The arrival of peak color in any one location varies from year to year.

Fall color reflected in a stream, West Virginia, Near Elkins, WV. Spotted the possibilities as I was crossing the bridge where I took this photo.

by Osprey Photo Workshops & Tours | Sep 20, 2015 | Digital Photography, Nature Photography, Uncategorized
Nature Photography highlights from Canadian Rockies

Sunrise view from hotel in Canmore, Alberta, Canada, Canadian Rockies
Arrived in Canadian Rockies 13 Sep. It was in the mid-80s that I was here last. Lots more buses and tourist now. Points accumulated on IHG rewards credit card and previous stays at IHG hotels qualified us for free overnight stays in several locations. IHG rewards club Good way to save money and extend our stay. First nights stayed in Canmore, approximately 20 km from Banff. Quieter town with fewer tourists. Beautiful view of mountains in front of hotel and behind town but warm light striking mountain tops did not last long, 6:45 to 715 PM. Aspen were yellow and were a striking contrast to the evergreens. Wildlife around Banff was limited – black bear inside forest edge & several elk on Banff Golf Course. More critters later. Raining yesterday and today. Hoping for better weather ahead.

by Osprey Photo Workshops & Tours | Jun 6, 2015 | Bird behavior, Bird photography, Digital Photography, Nature Photography, Photo classes, Photo instruction, Photo Technique, Photo Workshops

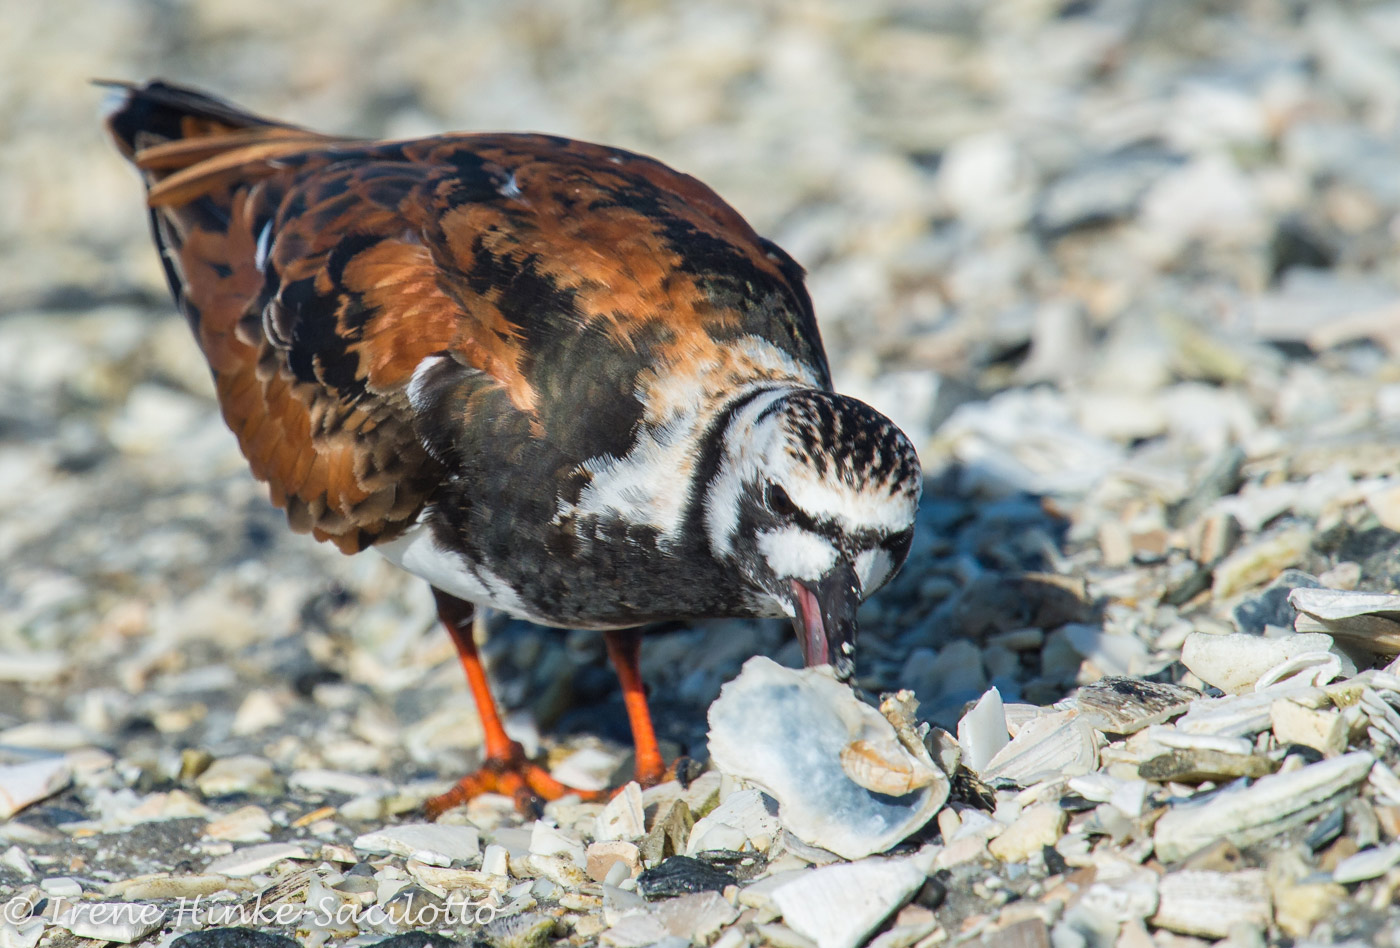
Rudy Turnstone.
Value of Patience when photographing wildlife.
The key to good wildlife photography is patience. During my photo workshop on Assateague Island, I observed two ruddy turnstones at Ferry Landing. Class participants took several fine photos capturing interaction between the two. Since I don’t typically photogrpah with the class, I could not resist returning to the same area on the following day in hopes of having similar success. That morning I spent several hours photographing ruddy turnstones, willets, and least sandpipers until canoers arrived interested in launching their boats from the shore. My patience resulted in several great shots including one showing the turnstone flipping shells in search of food, another feeding on eggs, one bathing, another stretching its wings, etc. If you want to capture action, you must watch and wait. If lucky, you will be able to capture behavior that you can not see with your eye. Of course you need fast shutter speeds for this. That is where fast lenses and cameras that perform well at high ISOs give you an advantage, With careful observation, you may be able to predict what is coming next which makes your images more unique. This sense of satisfaction is part of the reward for pursuing wildlife photography.

RuddyTurnstone

Ruddy Turnstone

Ruddy Turnstone bathing.

ruddy turnstone


